Jira integration
What is Jira?
Jira is a bug, issue, and project tracking software. Today, it has evolved into one of the most powerful work management tools available on the market and is utilized by teams all over the world that focus on product management, project management, agile, software development, bug tracking, and task management.
How can you use it?
Jira has multiple purposes and offers various solutions for your workflow. Jira Software Cloud can help you with sales, monitoring issues, keeping track or managing updates, notes, user reviews or more. It’s up to you how you will utilize this tracking software.
Issue tracking & management
Jira lets you create tasks, assign them to individuals and teams, set priorities, and track their progress. It also lets you move tasks in-between stages of development for maximum workflow transparency.
Reporting
With Jira, you can create comprehensive reports to understand the progress of specific projects better. For example, Jira can track how much you spend on each project to accommodate your workflow to your budget.
Scrum and Kanban
Jira provides ready to use scrum and kanban boards. These boards serve as task management hubs that house different tasks within a project. By utilizing these boards you can provide more transparency to the workflow of different teams.
Benefits
When you connect Jira with your LiveAgent account, you’ll be able to:
- View tickets connected to Jira tasks inside LiveAgent
- Merge tasks with tickets from specific customers
- Search for Jira tickets directly in LiveAgent
How to integrate Jira with LiveAgent
LiveAgent includes a native integration plugin for Jira, so you can easily connect the two apps from your help desk configuration. You don’t need any coding skills, just follow this guide to learn how to integrate Jira with LiveAgent.
The first step is to go to your LiveAgent Configuration. Go to the Integrations section and find Jira. Click on the activation switch to activate the plugin. LiveAgent will have to reload after this step.
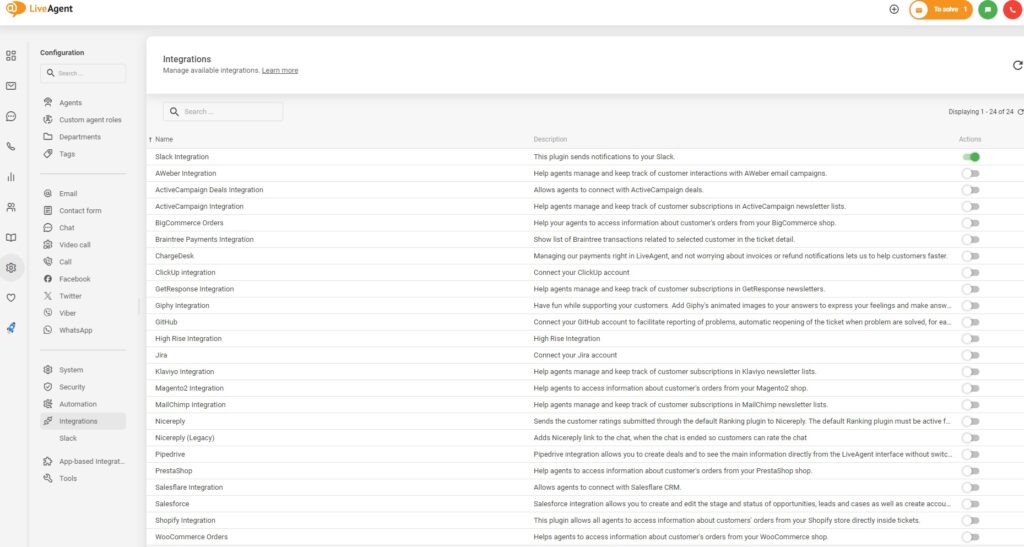
Find the active Jira plugin and click on the configuration wheel to set up your integration.
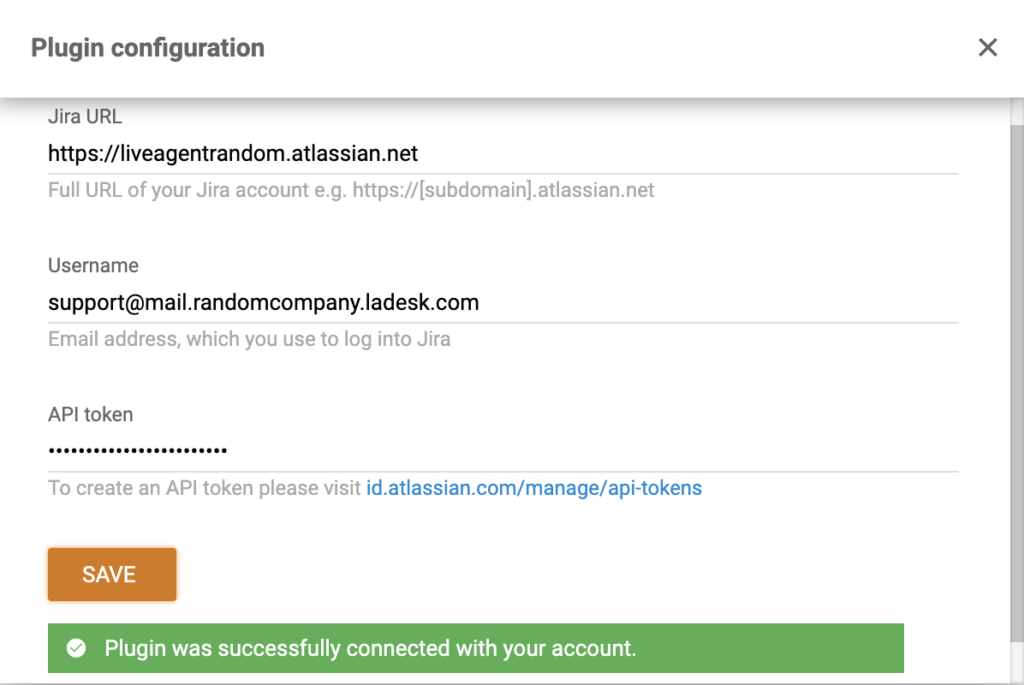
Now you need to enter your details. The first field has to include your Jira URL. Then type your email address in the second one. Use the email you used when setting up your Jira account. The last field requires an API token.
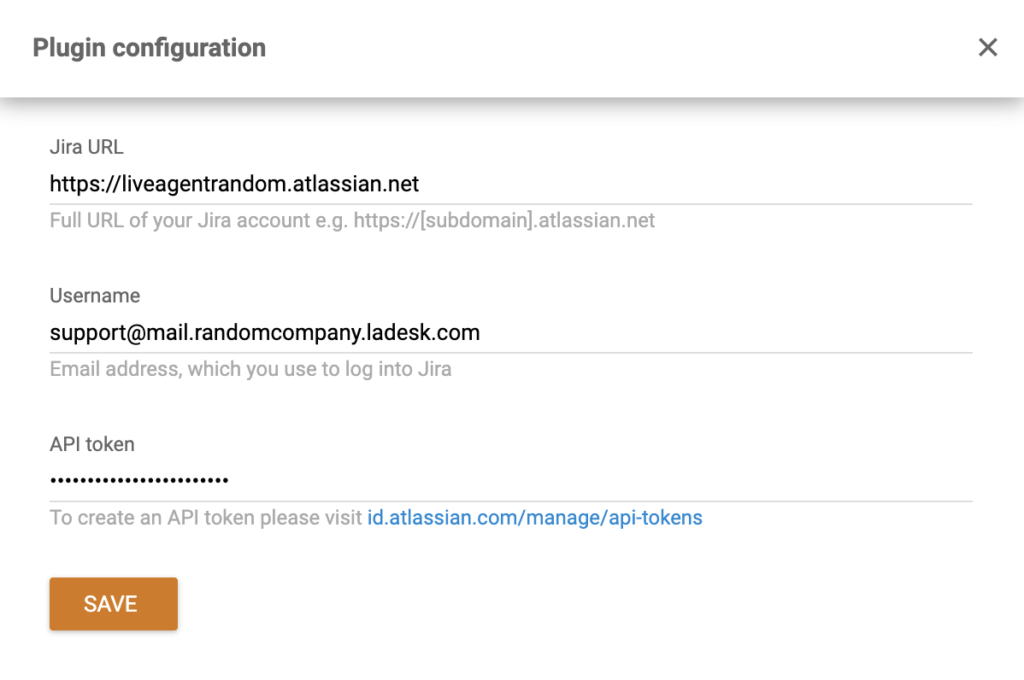
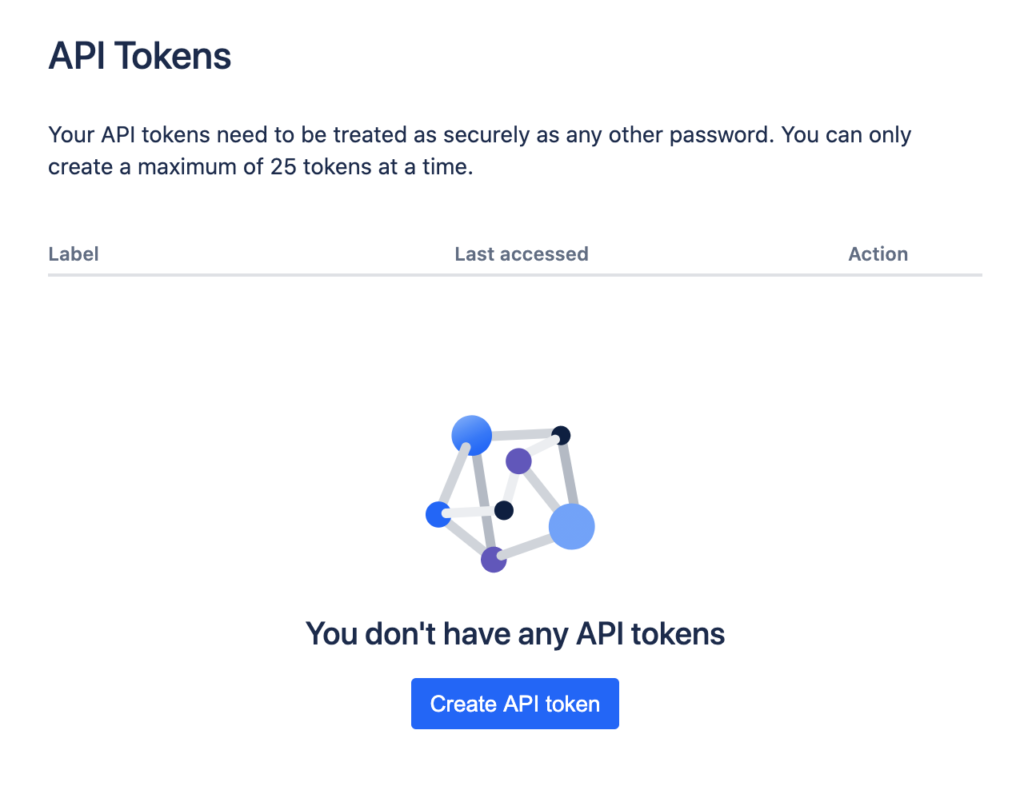
You can find a link below the field. Click on it and generate your API token, then copy and paste it into the API token field in LiveAgent.
Don’t forget to click Save when you’re done.
Now your Jira integration is all set up. To see how it works, open email tickets, or any other of your choice and look at the right panel. Here you can see icons of your integrations (if you have any already active). Look for the Jira logo in an open ticket.

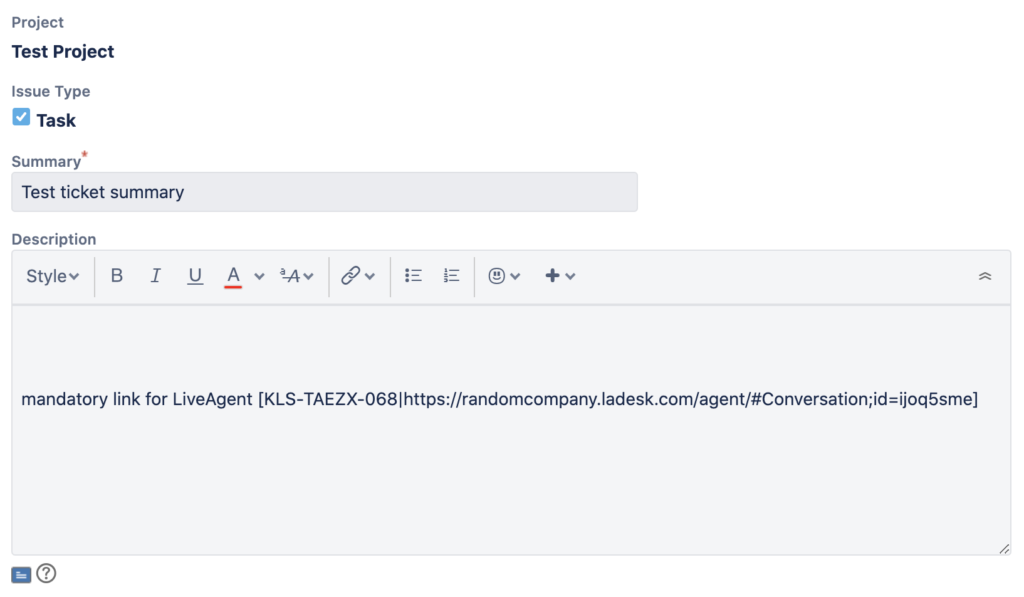
When you click on it, you can easily create an issue directly from the ticket view. After you click on the Create button, a new Jira window will open up, where you can set the specifics of the ticket.
How to integrate Jira Software Cloud with LiveAgent via Zapier
Integration via Zapier takes just minutes. It’s quite simple. Zapier connects two features of two different applications. In this case, the apps will be Jira Software Cloud and LiveAgent customer support software. There is no coding experience required to make them work together, just follow this simple guide or try to do it yourself on Zapier.
First of all, you’re going to need a Zapier account. If you don’t have one, you can create it here. When you log in, continue to the LiveAgent + Jira software cloud integrations page.
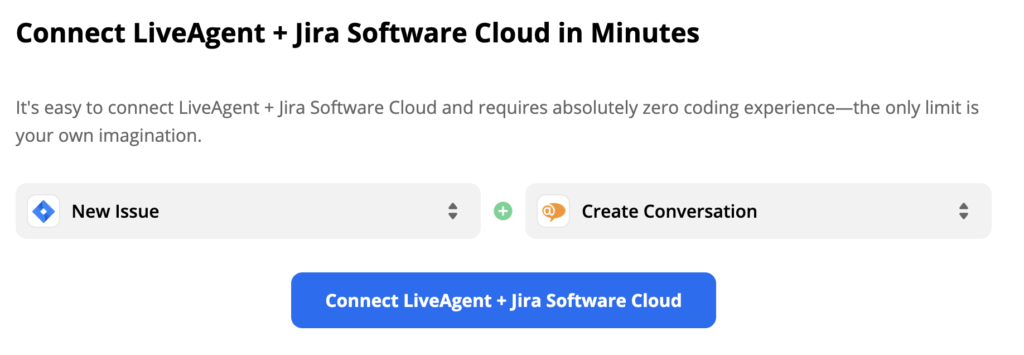
Scroll down at the page until you see the Connect LiveAgent + Jira Software Cloud in the dedicated section. Here you can select a trigger and an action. A trigger in one app activates an action in the other one, creating an integration. Pick the ones that suit your needs.
As an example, we’re going to show you integration with Jira trigger New Issue and LiveAgent action Create Conversation. When you’ve selected them, proceed by clicking the blue button.
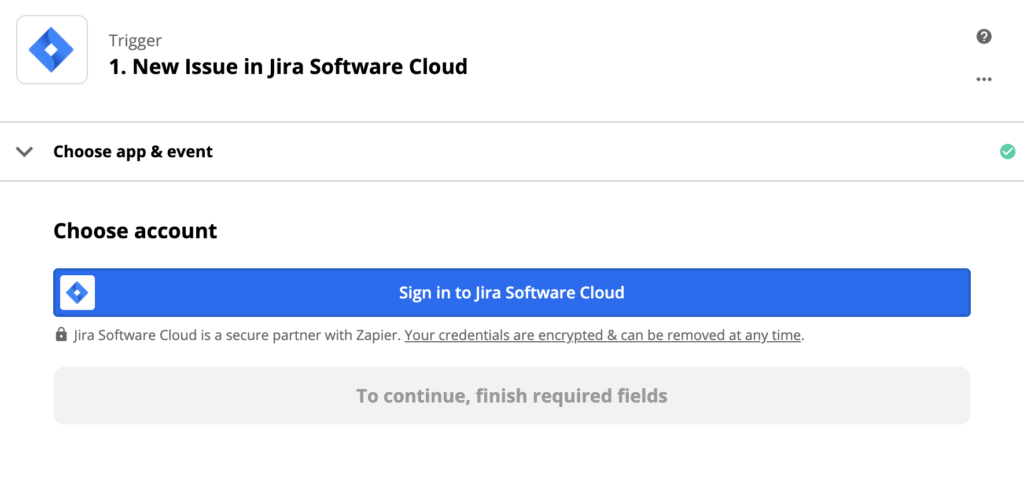
In this section, you have to setup the Jira Software Cloud trigger. Sign in to your Atlassian/Jira account and continue with the setup. You will need to give Zapier permissions to handle your data.
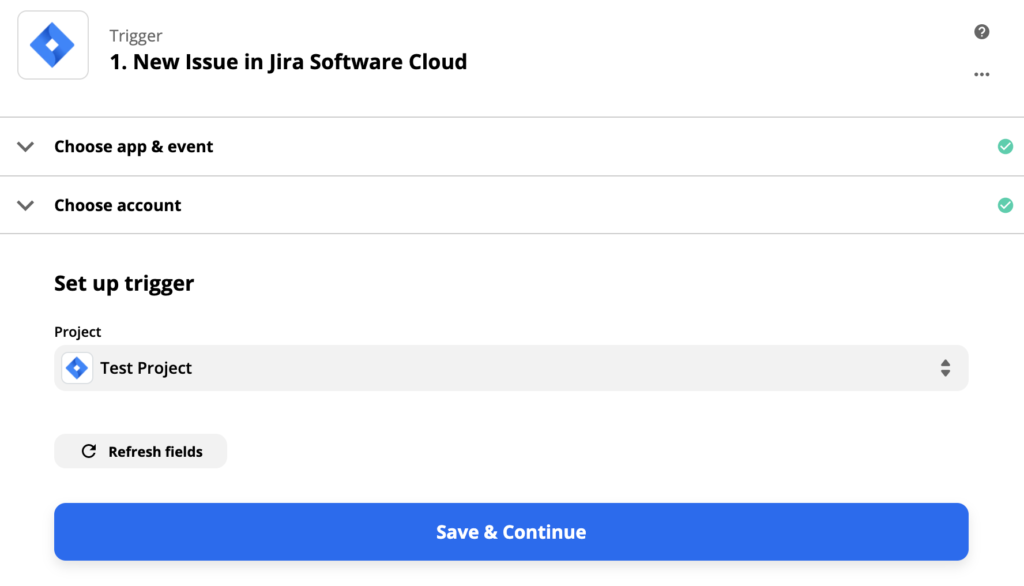
Click on Save & Continue when you’re done.
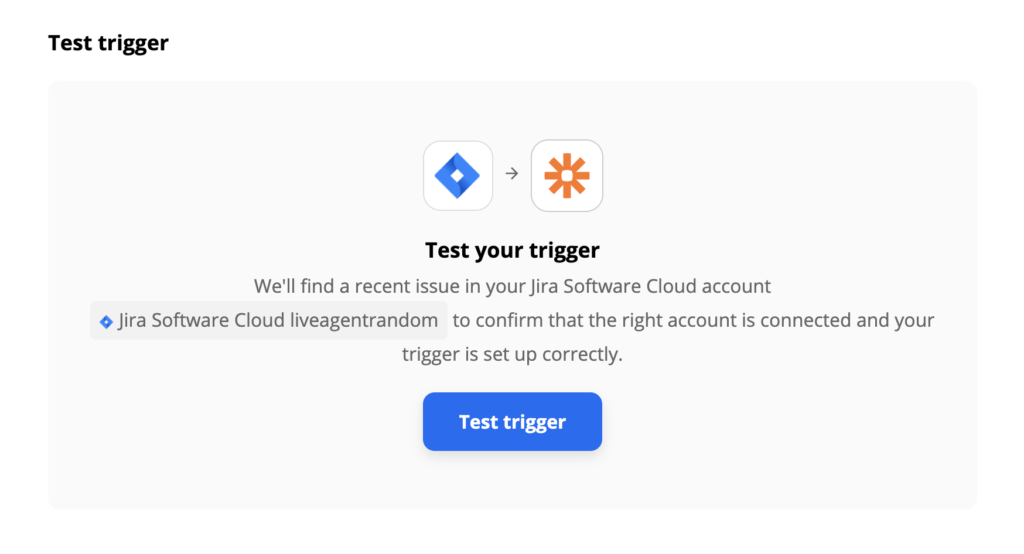
The last step in trigger setup is to test the trigger. You can skip this step but we highly recommend to go through the test. It takes just a few seconds. In case you run into any trouble, Zapier will offer you a handy troubleshooting guide to help you.
Now you have to set up LiveAgent action. The process is the same as before, except you need to fill out a few more fields, in our case to specify the conversation that will be created. Fill out the sender email, recipient email, subject and the message. In case you want to further specify the action, you can fill non-required fields too.
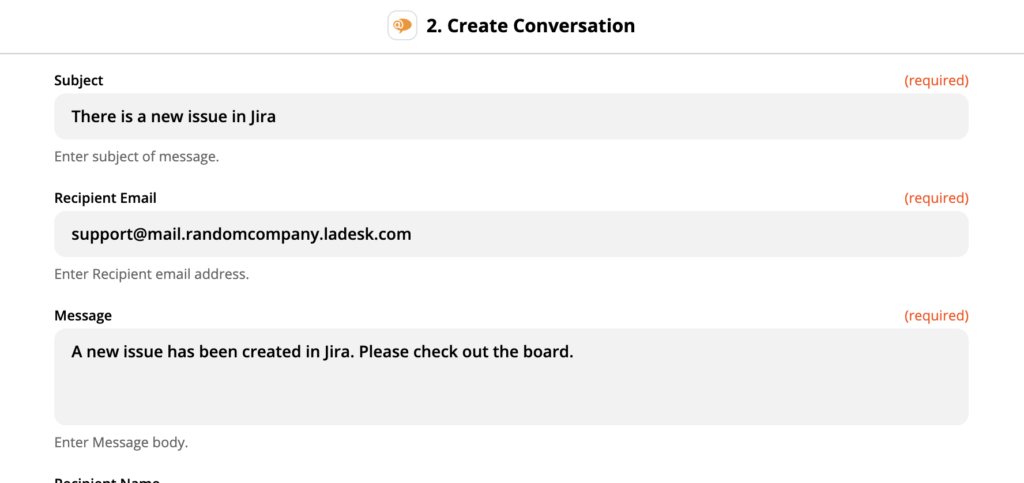
When you’re done do one final test of the integration.

After successful test, proceed to LiveAgent and have a look at your ticketing section. Every time a new issue is created in Jira Software Cloud you will get a ticket with information.
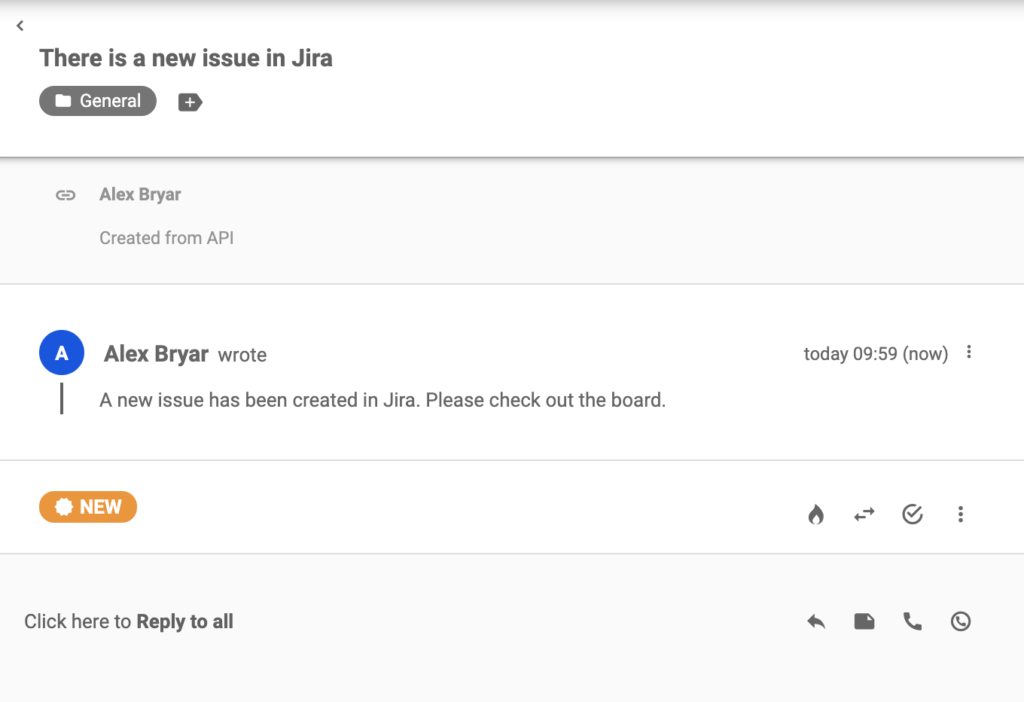
That’s it! You successfully integrated Jira Software Cloud with LiveAgent ticketing system.
Frequently Asked Questions
What is Jira?
Jira is a project management software that allows you to manage tasks, projects, and products. Moreover, it points out possible bugs that need to be fixed.
What are the benefits of using Jira?
The benefits are: customizable, useful plugins, user-friendly, increases workflow efficiency.
Discover how LiveAgent's extensive integrations, plugins, and apps can enhance your help desk software and boost customer satisfaction. Explore popular integrations with VoIP partners like Hero, Orion, and Redspot, plus CRM, eCommerce, and more. Visit us to streamline your communication and elevate your business with easy integration guides.
The right help desk software for any startup
Boost your startup's growth with LiveAgent! Get 6 months free of multi-channel help desk software to elevate customer support & satisfaction."

 Български
  Čeština
  Dansk
Dansk  Deutsch
  Eesti
Eesti  Español
  Français
  Ελληνικα
  Hrvatski
  Italiano
  Latviešu
  Lietuviškai
  Magyar
  Nederlands
  Norsk bokmål
  Polski
  Română
  Русский
  Slovenčina
  Slovenščina
  简体中文
简体中文  Tagalog
  Tiếng Việt
  العربية
  Português


