Slack integration
What is Slack?
Slack is a free cloud-based team collaboration tool that allows users to exchange text messages and files in real-time. It basically acts as a company messenger with additional features that enable users to search for messages, connect third party applications, or conduct phone and video calls.
How can you benefit from using Slack at work?
Using Slack is very beneficial because:
- Using it declutters your email inbox
- It grants you almost immediate responses from your colleagues
- You can view all your colleague’s contact information from one place
- You can save messages and files for later
- You can create reminders about messages
- You can send messages to yourself (so you don’t forget ideas or tasks)
How can you benefit from connecting Slack with LiveAgent?
By connecting your LiveAgent account with Slack, you’ll be able to receive automatic notifications inside a designated Slack channel for:
- Any new tickets received in LiveAgent
- Any opened tickets (whenever you receive an answer from a customer)
- All closed tickets
- Setting rules
Therefore, by connecting Slack with LiveAgent, you can receive notifications about new tickets or changed ticket statuses even when you don’t have your LiveAgent dashboard open. Slack will remind you in your designated channel, and you’ll know it’s time to answer some customer service questions.
Slack integration with LiveAgent
Slack with LiveAgent can become powerful tools in your hands. Chat with your colleagues in real time, while you handle agent conversations, video calls, or other forms of customer interactions from your LiveAgent app. Your Slack can be integrated directly with LiveAgent via our custom plugin. It’s available in your LiveAgent account, so there’s no need to download anything extra.
First of all, enter your LiveAgent account and go to Configuration > Integrations. Find Slack Integration in the list of plugins and click on the Activate slider.
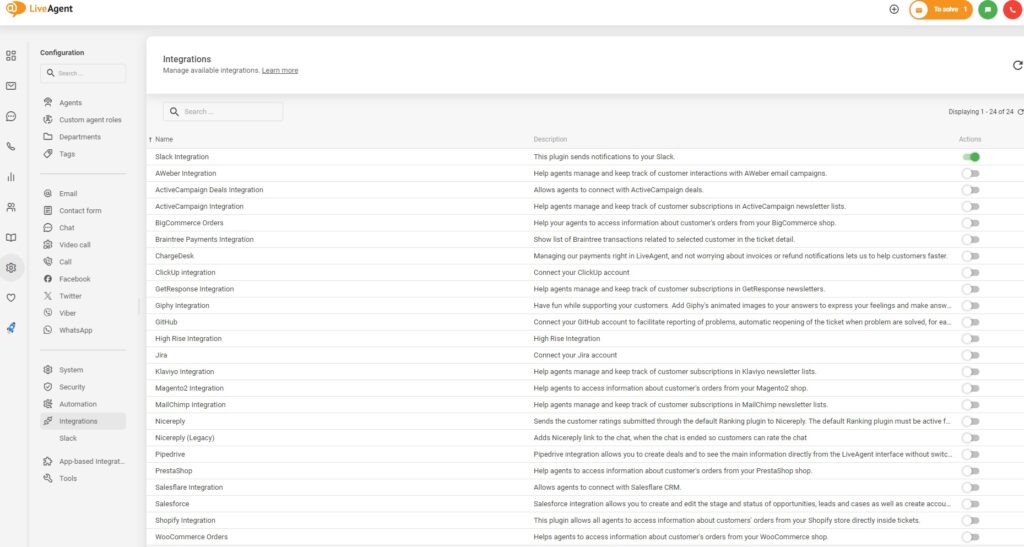
When you’re done, you can see the integration as active. At the Configuration section, scroll up to the top to the section with your available communication channels. Click on Slack and then click on the Add to Slack button in this section.
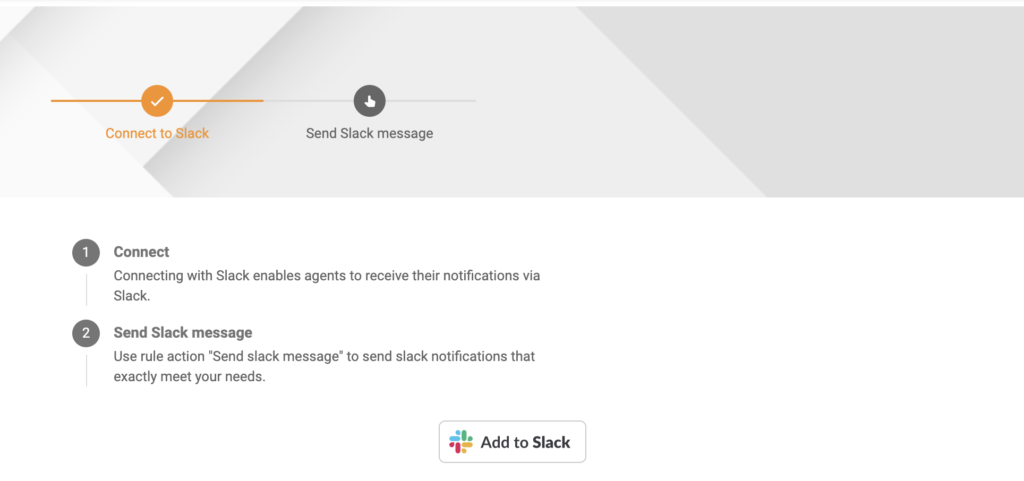
Slack will need access to some data. If you agree with providing access to the data, you’re finished with the integration setup.
Your agents can also configure custom notifications. Click on your name initial in the top right corner of your LiveAgent app and select edit profile. Then go to the Notifications section. You can see a separate section for Slack notifications. Choose a Slack user and select what you want. After that, click on Save.
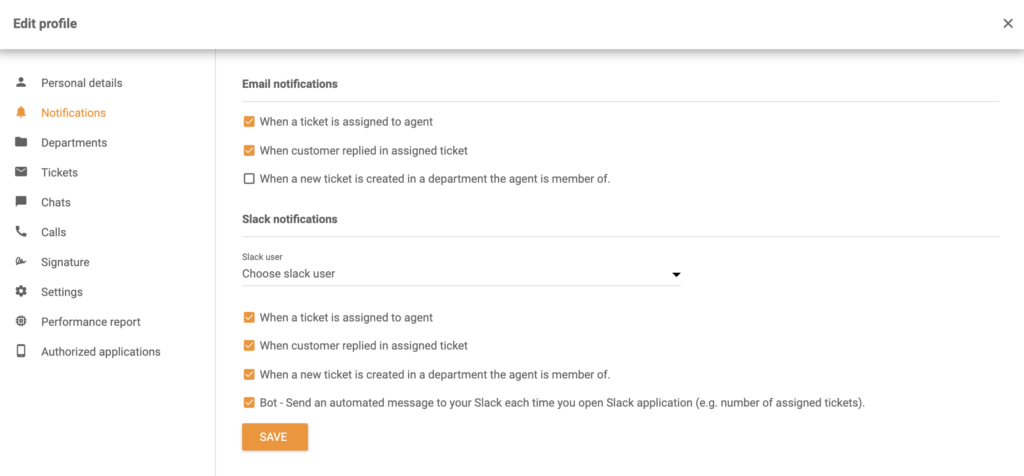
How to setup custom Slack notifications in LiveAgent
The Slack app integration also allows you to set up new Rule action – Send Slack message in LiveAgent. You can define as many Slack notification Rules with your own setup and conditions. That way you can adjust your Slack integration to work as you want it to and get notifications on specific events. That’s where the power of our Slack notification lies.
Follow this guide to make custom Slack notifications. When you’re creating a rule in LiveAgent, you can see an option Send Slack message. This means that whenever conditions of the rule are met, Slack will trigger a custom notification. It can be sent to Slack workspace or to a specific user within that workspace.
Let’s take an example of setting up a Slack notification – Send Slack notification when a tag is added to a ticket. Tags can have various uses and can be custom made. For example, you can create a tag “Urgent” for tickets that should be solved as a priority over others.
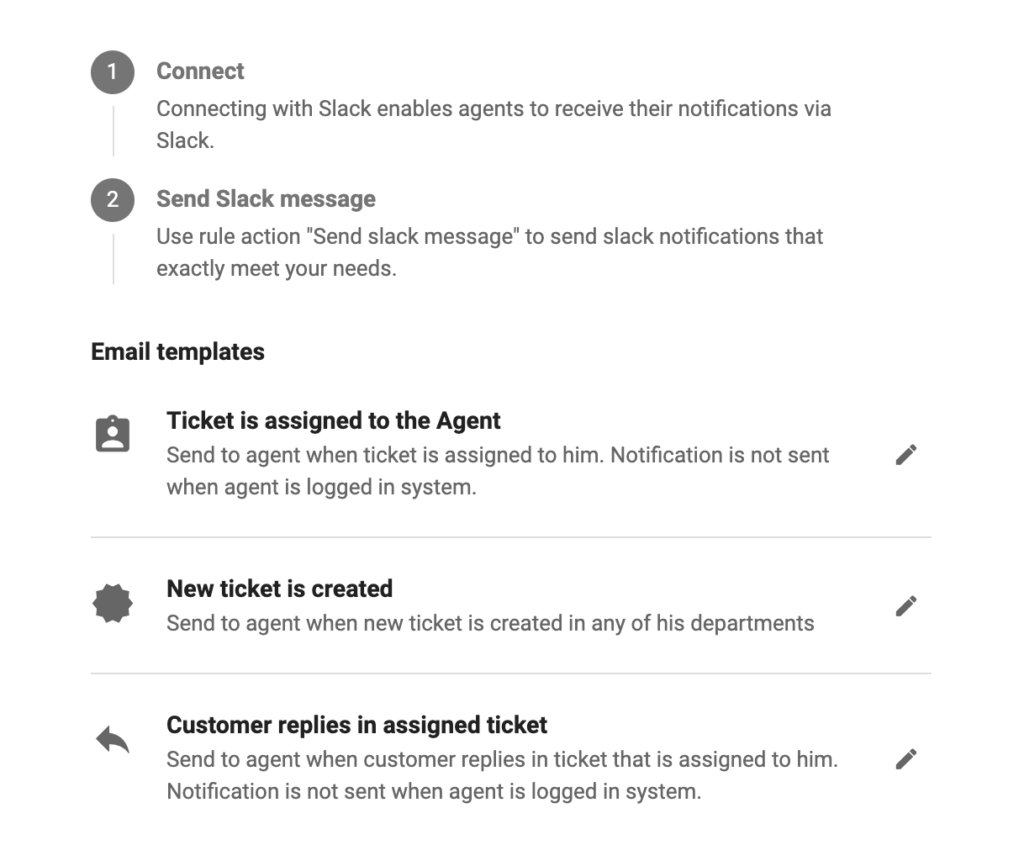
While you’re in LiveAgent’s Configuration > Slack, click on the pencil icon next to Ticket is assigned to agent. A new edit window will open up.
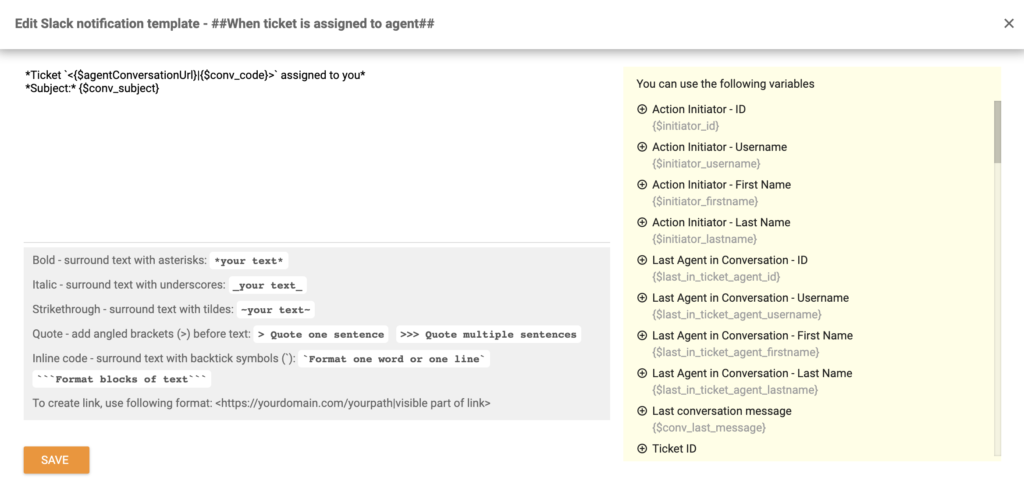
Here you can create your custom notification by following the guide available in this window down below. In this example, we use rule trigger ticket tags changed and we defined the trigger will active when the tag “Urgent” is added into a ticket in a specific department. The action of the rule is to send Slack message to a specific user in the Slack app.
We can also send the ticket ID, date of creation and name of the agent who added a tag.
Here is an example of such a message and line of code. Create your own example or copy the one below in case you want to add a notification for specific tags. Just make sure you use the correct tag name. Click Save when you’re done.
Ticket *<{$agentConversationUrl}|{$conv_code}>* created on {$conv_datecreated} from {$initiator_firstname}{$initiator_lastname} under department {$conv_departmentName} was marked as *Urgent*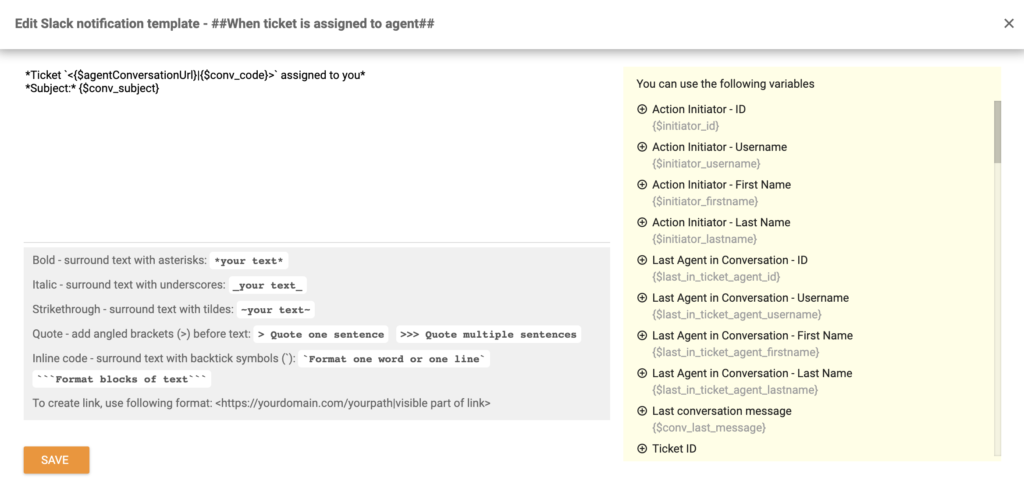
Now, when we add the “Urgent” tag into a ticket in LiveAgent, a notification will immediately let us know about it in Slack.


How to integrate Slack with LiveAgent via Zapier
If you want to connect Slack with LiveAgent via Zapier integration, you can follow this simple process. Zapier makes it easy to set up specific events that work between two software. These are called triggers and actions. You can set up a specific trigger in one integrated software and that will cause an action in the other.
The process is simple, it can be done in a matter of minutes and there is no coding experience required. First, you need to log in to your Zapier account. If you don’t have a Zapier account, you can create one at this link. When you’re done, go to the LiveAgent and Slack integrations page on Zapier.
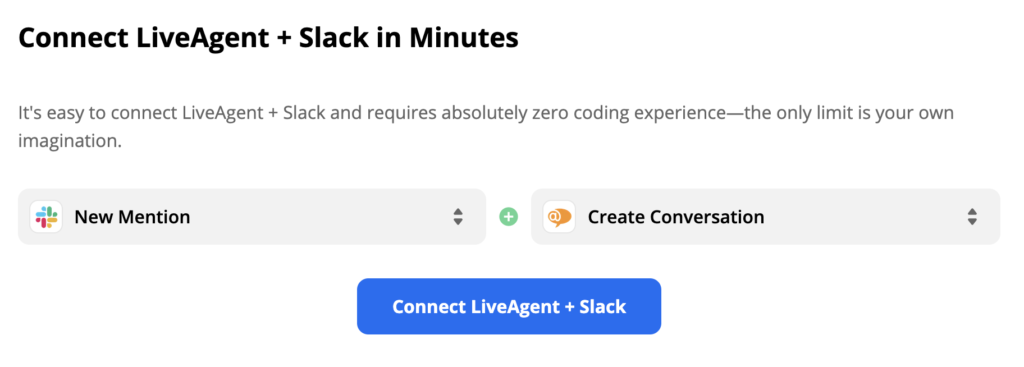
Scroll down until you see Connect LiveAgent + Slack in Minutes headline. This is a section where you can pick your preferred action and a trigger.

As mentioned before, with this Zapier integration you can select triggers and actions that suit your needs so think about what you want your integration to do and take a pick. As a showcase for this guide, we picked Slack trigger New Mention and LiveAgent action Create Conversation. When you’re done, click on the blue button Connect LiveAgent + Slack.
The following section requires you to configure your custom Slack trigger. In our case, we need to configure a User Name, Highlight Word and Trigger for Bot Messages.
We left the User Name field clear because we don’t want our trigger to be tied to a specific user, but rather all of the users in our Slack. As a Highlight Word, we picked the phrase “problem” and we selected No for bot messages. Now every time the word “problem” will appear in any of our Slack channels or Slack message, we will get a ticket automatically in our LiveAgent.
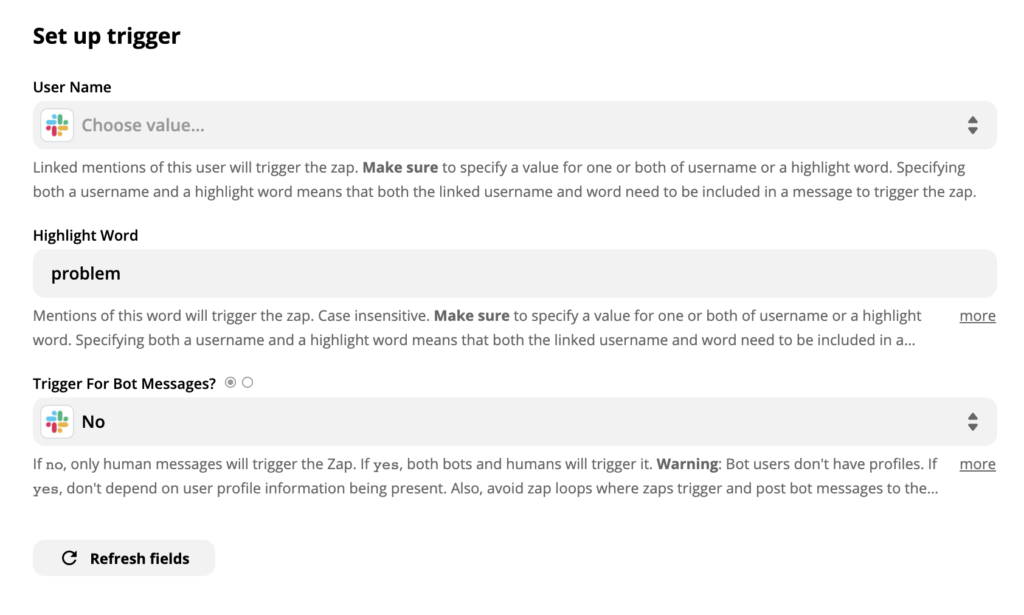
When you’re done, make sure you test your trigger to see if it works correctly. This test can be skipped but we recommend it to prevent any issues later in the process.

When you’re done all that’s left to do is setup the LiveAgent action. In case you want to specify an action, even more, make sure you fill out non-required fields too. Otherwise, fill out just the required fields such as email address and message subject.
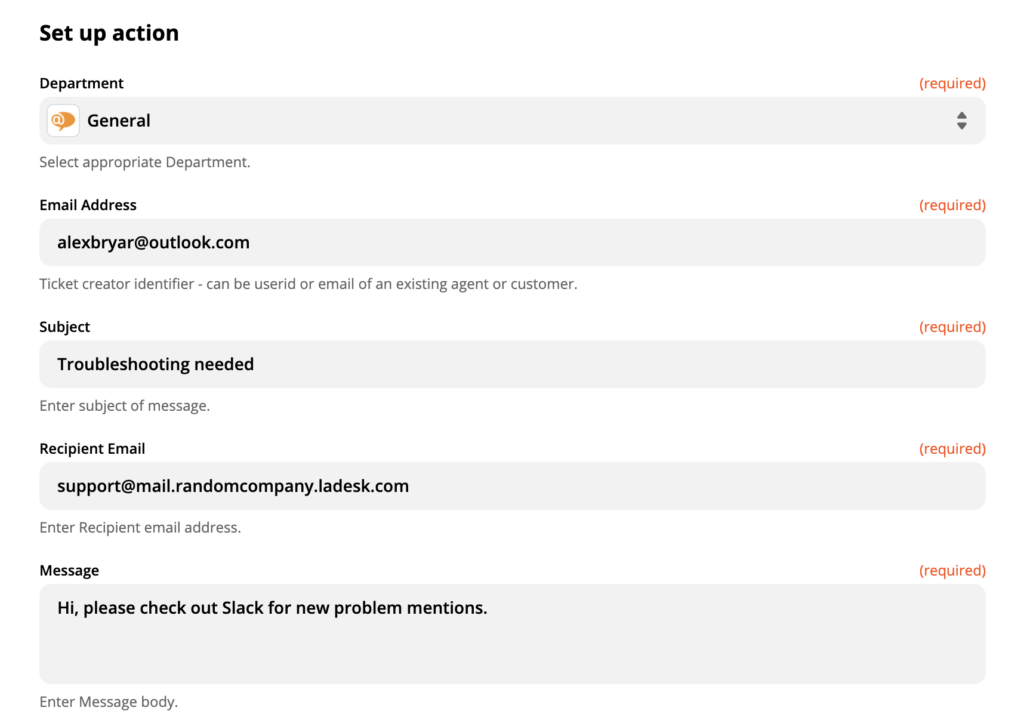
When you’re done, make a final test to see if the integration works as you want it to. If you run into any trouble, Zapier will automatically recommend a handy troubleshooting guide for you.
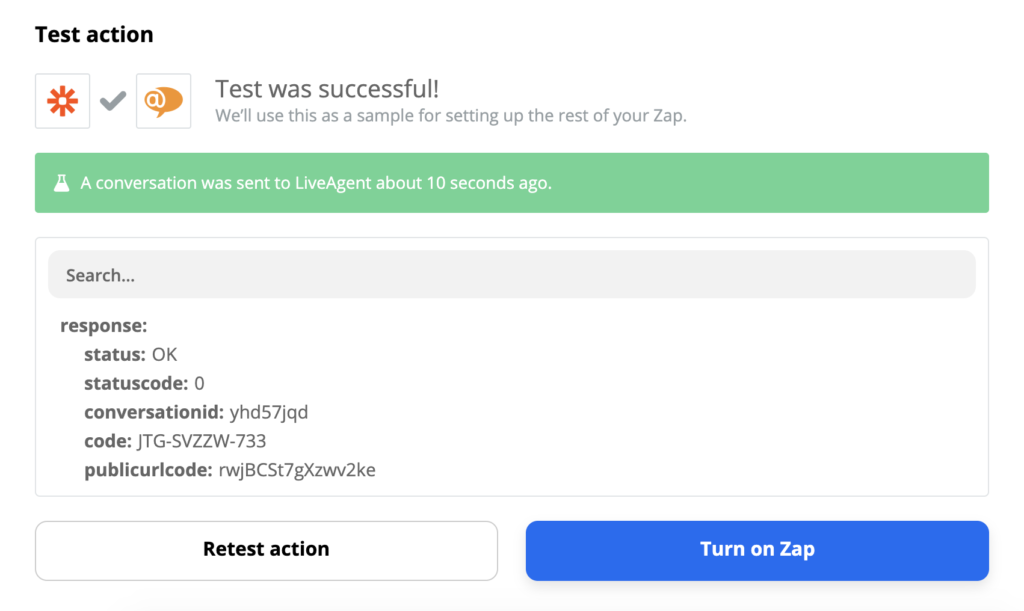
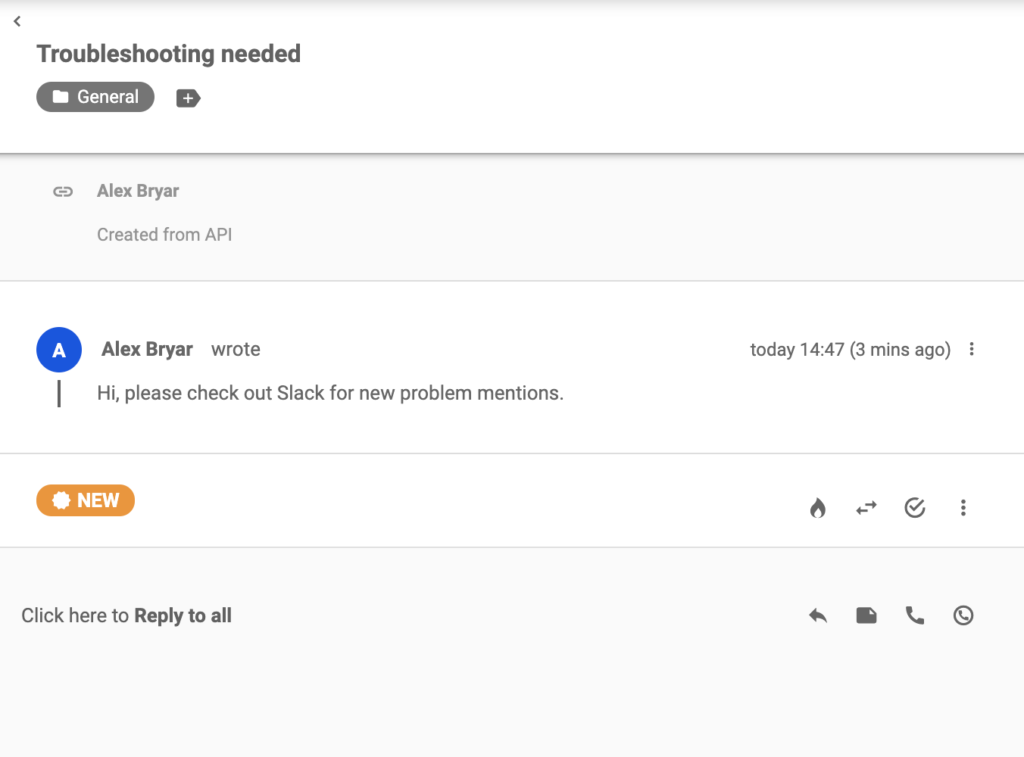
You’re done. Now you can test out your Zapier integration live. We sent a test message into our Slack app chat channel.

That triggered action in LiveAgent and we got a ticket about a new problem in our Slack support channel.
Frequently Asked Questions
How can you utilize Slack integration?
In simple words, the integration allows you to get notified whenever you get a new ticket or when a customer inquiry gets closed or opened.
How can you integrate Slack with LiveAgent?
The first step is to navigate to Configurations from your LiveAgent dashboard. After that, search for Slack and click on Add Slack. Connect and utilize immediately.
Can I use slack for customer support?
To decide whether to use Slack for customer support, one needs to evaluate its ability to meet customer needs, including structured ticketing, tracking capabilities, and CRM system integration. Its management of multiple channels, response timeliness, privacy, and data protection compliance should also be considered. The decision should be based on the tool's feature assessment, organizational suitability, and ability to deliver a positive customer experience.
Discover how LiveAgent's extensive integrations, plugins, and apps can enhance your help desk software and boost customer satisfaction. Explore popular integrations with VoIP partners like Hero, Orion, and Redspot, plus CRM, eCommerce, and more. Visit us to streamline your communication and elevate your business with easy integration guides.
Provide excellent customer service
Discover unparalleled customer support with LiveAgent's all-in-one software. Benefit from 24/7 service, a free trial without a credit card, and seamless integration across 130+ ticketing features. Enhance your business with fast setup, AI assistance, live chat, and more. Choose LiveAgent for exceptional service and satisfied customers.

 Български
  Čeština
  Dansk
Dansk  Deutsch
  Eesti
Eesti  Español
  Français
  Ελληνικα
  Hrvatski
  Italiano
  Latviešu
  Lietuviškai
  Magyar
  Nederlands
  Norsk bokmål
  Polski
  Română
  Русский
  Slovenčina
  Slovenščina
  简体中文
简体中文  Tagalog
  Tiếng Việt
  العربية
  Português


