Key takeaways
Pros
- Well-balanced feature set
- Great performance
- Good customization options
Cons
- Mandatory branding in one of the plans
Getting started with Pure Chat live chat
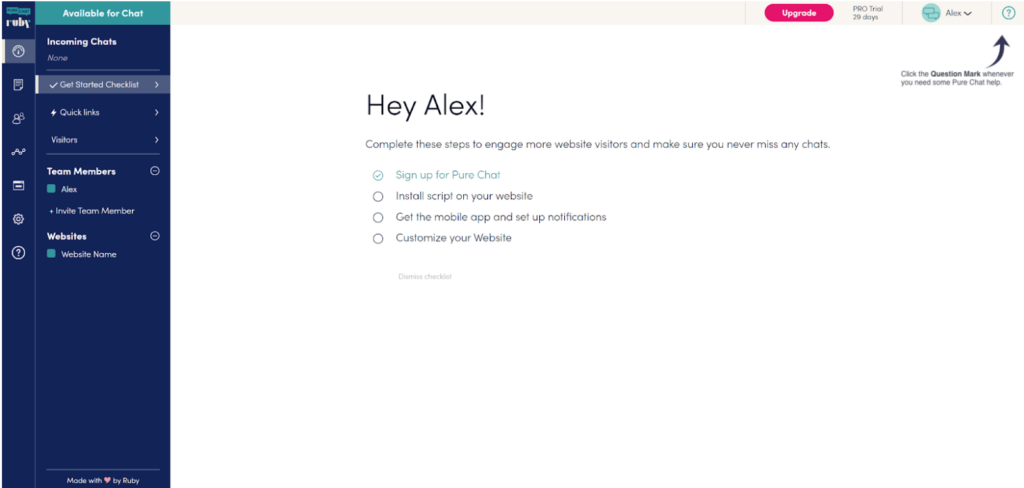
Pure Chat has one of the fastest registration processes you can get. All it takes is to sign up, provide your contact information and you will be taken to the dashboard. The dashboard itself shows you the remaining steps to get your live chat widget up and running. No long processes, just a productive approach that lets you get right into it.
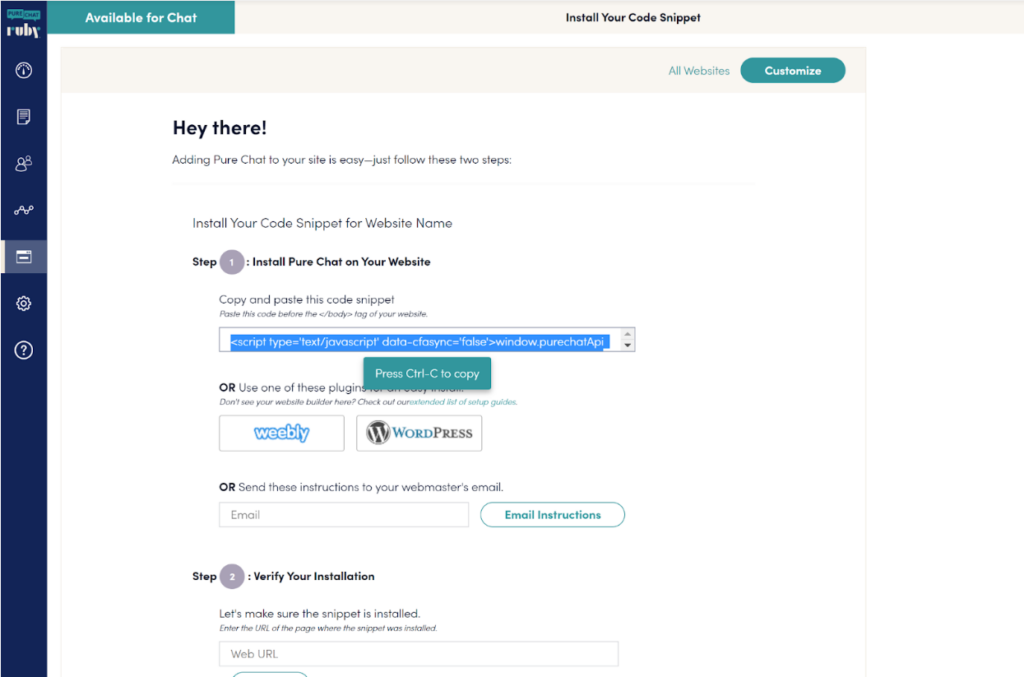
The next step guides us directly to the installation of the script on the website. You can choose to install it on your own, by copying and pasting the code, or try a direct integration if you use either Weebly or WordPress. Alternatively, you can send the instructions to your website administrator via a ready email form. There is also an option to verify the live chat installation, so you can make sure it works as intended.
What I failed to notice the first time were the customization options for your live chat. You can switch to the Customize section at the top of the interface and adjust your chat widget to your liking, as well as change the settings. Overall, the customization options are very good, and they are not too cluttered with unnecessary things. You can customize the colors and design for the web and smartphone version, set availability messages and email form, have some fun with triggers, and much more.
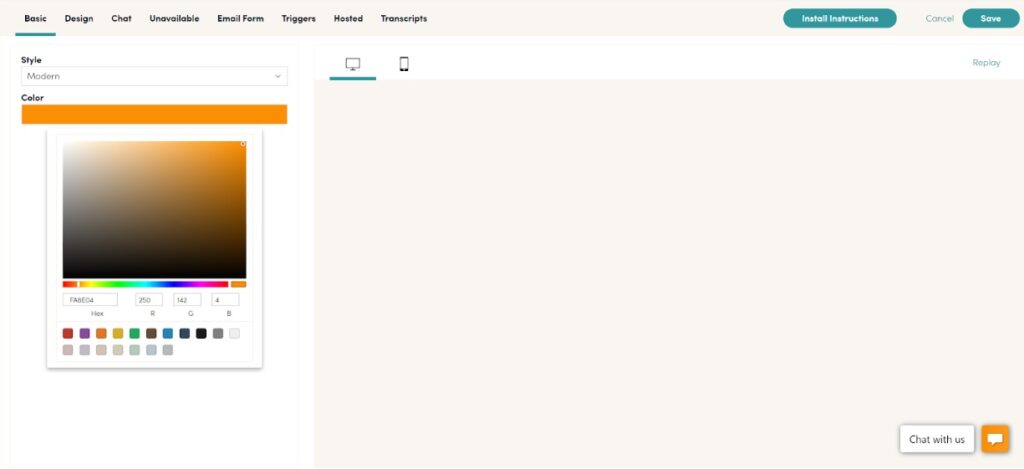
Once you’re happy with the customization, you can integrate the live chat widget. I decided to do a manual integration, as it seems like the easiest option out of the three. The code worked perfectly, and I could get started with the testing part of this review. However, first we’ll take a look at the features and design of the Pure Chat live chat.
Features and user interface
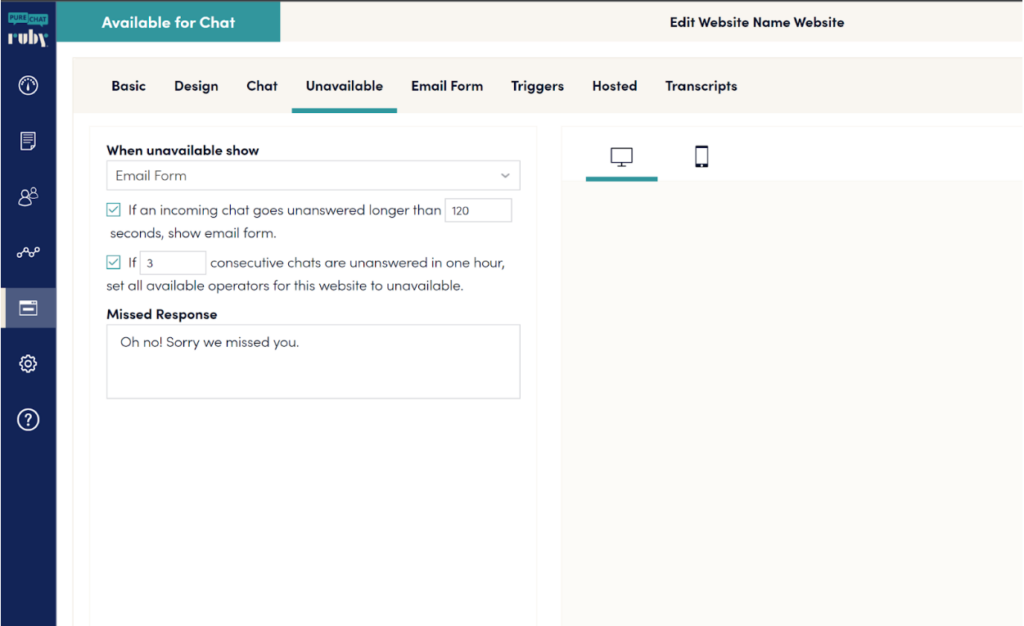
The Pure Chat features are what you would expect from a live chat solution, however there is some room for improvement. You get the standard stuff, such as advanced widget customization, security roles, and canned responses. You can adjust email forms and automated responses for when your agents aren’t available. Most of these features are available directly in the widget customization settings, so you shouldn’t have any trouble finding them.
Pure Chat also offers analytics and visitor tracking features, both of which are very useful for any communication software. Additionally, you have the option to receive complete chat transcripts. Pure Chat also supports some integrations with solutions such as HubSpot, Zoho, MailChimp and more. That’s pretty much it when it comes to features. Now we’ll take a look at the live chat in action.

Live chat performance and user experience
I took the Pure Chat live chat for a spin from both sides, so I could get a good idea of how it works for agents and customers at the same time. The chat widget was integrated successfully, and I didn’t even have to use the verification option that has been mentioned earlier in this review. Once I clicked on the chat widget, I could get started with the testing.
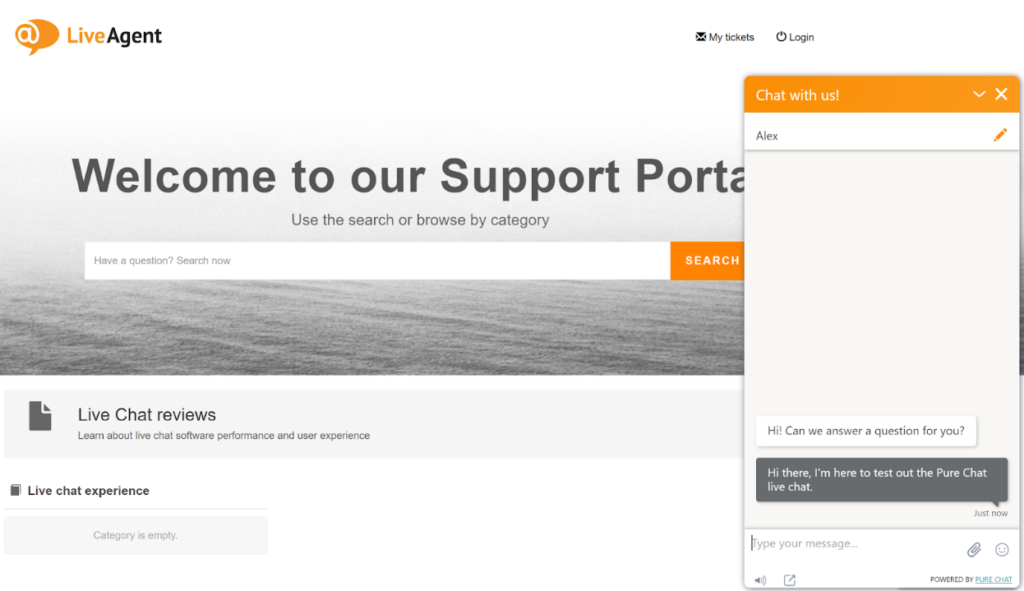
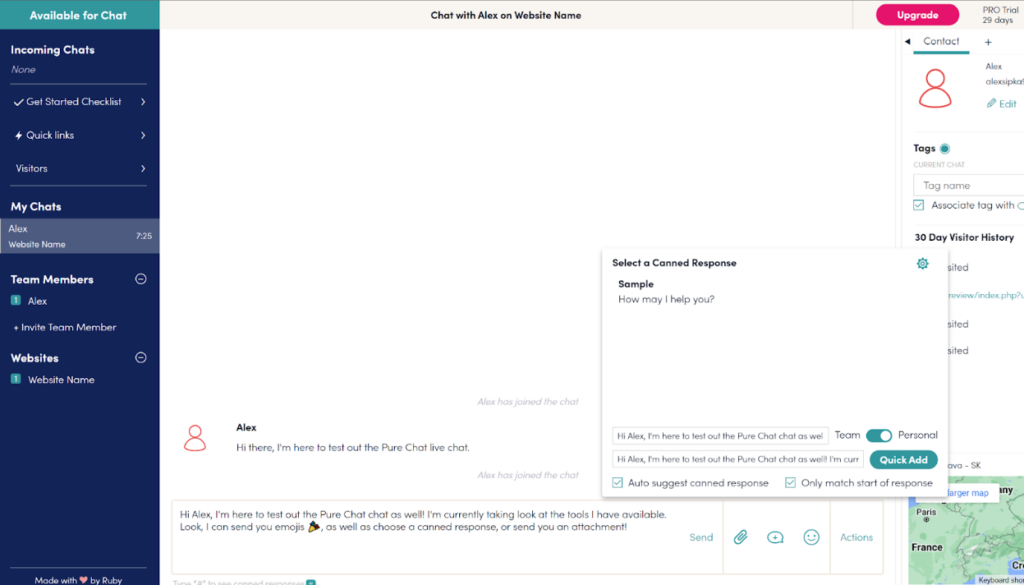
The tools available for agents are good and I don’t think anything essential is lacking. Besides writing chat messages, you can take advantage of the emoji selection, use canned answers, and send attachments. The attachments include standard file and image types, so you shouldn’t have any trouble with this feature.
Overall, Pure Chat is pretty great. The speed is just fine, and I didn’t experience any significant lags or other problems during my testing. In fact, the overall experience was smooth, just as you expect from a professional live chat solution. The features don’t really bring anything new, but that’s not a huge problem since everything that is essential is available and most users rarely need anything extra.

Pricing
Pure Chat offers two plans with varied pricing options. While both of them offer mostly the same features, there are certain differences in limits. Both plans include unlimited chats, advanced widget customization, all integrations, engagement hub, iOS and Android apps, security roles, unlimited chat history transcripts, canned responses, chat notifications, file transfers, trigger-based actions and alerts, real time analytics, visitor tracking, reports, CSV exports, and support.
Growth
It costs $39 per month if you pay annually, or $49 per month with monthly billing. It supports a maximum of one website and four users. Each additional user will cost you $13 per month. You get 100 SMS notifications. The plan lacks the option to remove the Pure Chat branding.
PRO
The PRO plan costs $79 per month annually, or $99 per month with the monthly billing option. It supports 10 users, with $8 for each additional user. This plan offers support for an unlimited number of websites, and 1000 SMS notifications. You get the option to remove Pure Chat branding.
Conclusion
Live chat by Pure Chat is pretty good, all the necessary features are there and the performance is flawless. While it doesn’t bring anything new, the selection of tools and features is working very well, and that’s the most important thing. The pricing is very affordable and reasonable, however users might be forced to pay for a more expensive solution, since the cheaper plan doesn’t allow removing the Pure Chat branding.
Frequently Asked Questions
I’m not receiving messages in the Pure Chat app
This issue might be related to a few common problems that can be solved very easily. First of all, double-check your Pure Chat live chat code and see if it was correctly implemented on your website. You can use the verification option in Pure Chat too. If you’re not sure if the code was compromised in some way, simply delete it from your website. Then copy and paste it again, making sure you copy the entire code. Another solution is related to cookies, where a simple clearing of your browser cache can remove the problem.
The visitors can’t send attachments
The option to allow file transfer by visitors is most likely turned off in the settings. Open Pure Chat and go to Websites. Click on Customize, select Chat and go to the In-Chat tab. You can enable the file transfer here by ticking the Enable File Transfer box. There is also an option to edit the File Send Failure Message.

 Български
  Čeština
  Dansk
Dansk  Deutsch
  Eesti
Eesti  Español
  Français
  Ελληνικα
  Hrvatski
  Italiano
  Latviešu
  Lietuviškai
  Magyar
  Nederlands
  Norsk bokmål
  Polski
  Română
  Русский
  Slovenčina
  Slovenščina
  简体中文
简体中文  Tagalog
  Tiếng Việt
  العربية
  Português


